
 8 hours ago
3

The post 19 Chili Bar Ideas That Let You Finally Sit Down and Eat appeared first on Penny Pinchin' Mom.
The first time I hosted chili for a crowd, I made two pots on the stove, one mild for the kids and one hot for everyone else, and I spent the whole night standing between them with a ladle. My plate went cold on the counter. Somebody else ate my cornbread.
A chili bar fixes that. You put out one pot, line up the chili toppings, and let guests build their own bowls while you sit down with yours.
These chili bar ideas start with running one pot or two, so the picky eaters and the heat lovers both get fed. There’s a meatless pot in here for the vegetarian guest you always forget to plan for, plus how to keep everything hot without babysitting the slow cooker. The same chili party ideas carry over to a chili cook-off or a baby shower in February. Set it up once, then go sit with your people.
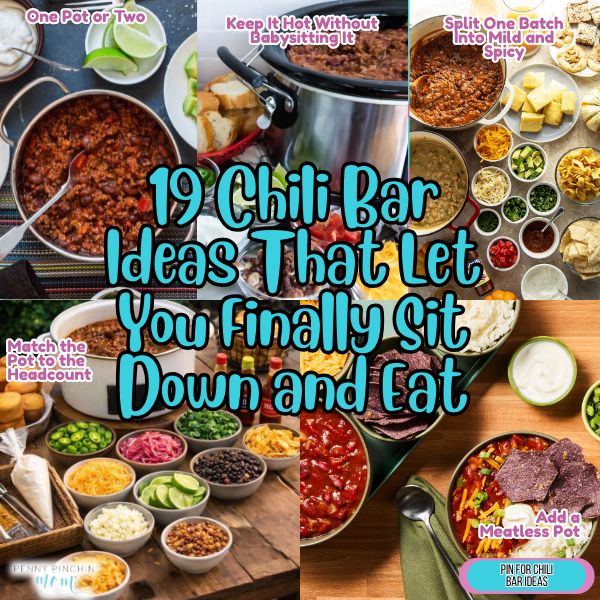
Start With the Pot
1. One Pot or Two
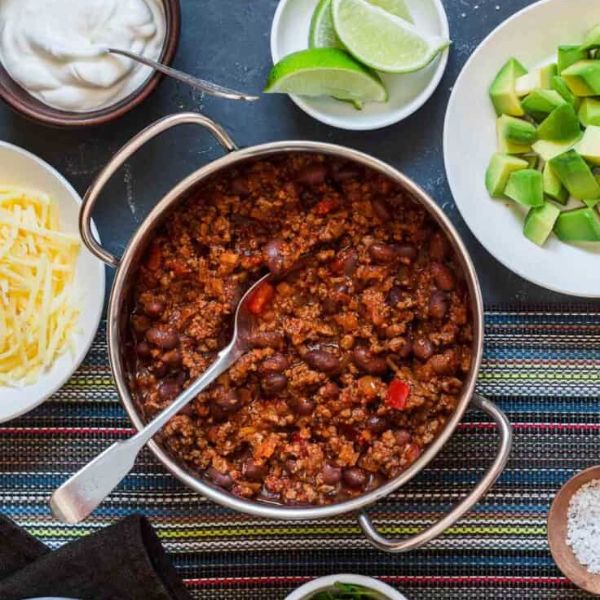
The guest who swears by classic red chili and the guest who only eats white chicken chili will both show up to the same party, and you don’t have to pick sides. Run a red chili in one slow cooker and a white chicken chili in the other so both camps get their favorite.
A basic crockpot chili that feeds 8 to 10 runs about $15 to $20 in ground beef, beans, tomatoes, and seasoning. White chicken chili costs a bit more, closer to $20 to $25 once you add shredded chicken, white beans, and green chiles. Prices shift by region, so expect a few dollars either way.
For the pots themselves, pull from “23 Crockpot Chili Recipes You Start Before the School Bus Comes” and “21 White Chicken Chili Recipes That Feed a Full Table From One Pot.”
2. Keep It Hot Without Babysitting It
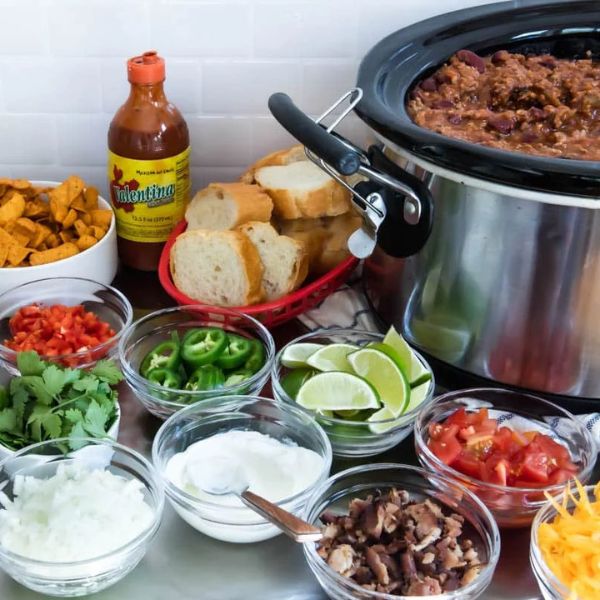
A slow cooker set to warm is what lets you sit down. It holds already-hot chili at 140°F or above for hours, which is the whole point of a chili bar: guests ladle, you eat.
The order matters. Heat the chili all the way through first, either on the stove or on high in the slow cooker, and only then switch to warm. Warm is a holding setting, not a cooking setting, so it will not safely bring cold or raw ingredients up to temperature.
If you need a cooker, a basic 6-quart one costs around $25 to $35 at Walmart or Target. I keep two now that it’s just my husband and me, and they come out every single time we host.
3. Split One Batch Into Mild and Spicy
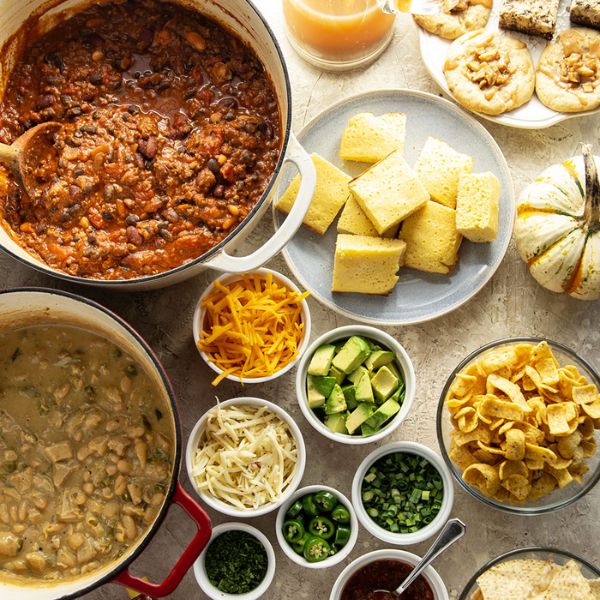
Make one large mild batch, then divide it. Ladle half into a second cooker and build the heat there with a can of chipotles in adobo, about $1.50, or a couple teaspoons of cayenne from a $2 jar.
You cook once and still serve two pots, which cuts your grocery total compared to shopping for two separate recipes. A single 10-serving mild base plus the heat add-ins comes in right around $18 to $22.
Season the spicy half an hour before guests arrive so the heat has time to bloom and spread evenly. Taste it then, because chipotle keeps building as it sits on warm.
4. Match the Pot to the Headcount
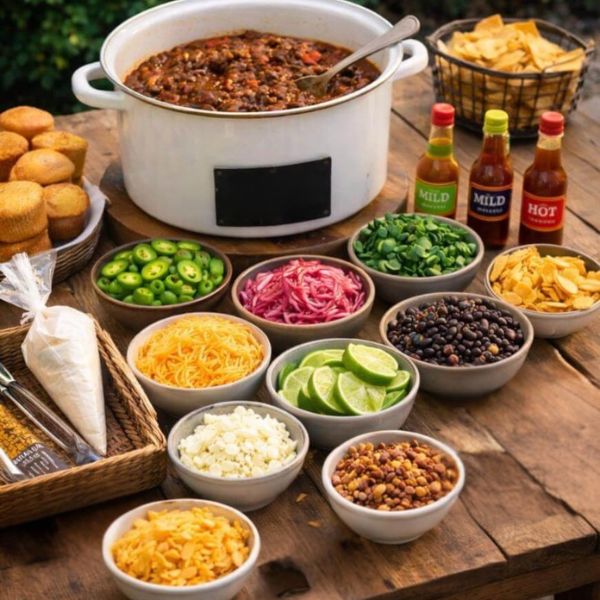
Pot size decides how many bowls you get, so do the math before you shop. A 6-quart slow cooker holds roughly 24 cups of chili, which is 8 to 10 servings at a cup and a half apiece. An 8-quart holds closer to 32 cups and covers 12 to 14 servings.
An 8-quart cooker comes in around $40 to $50 at Walmart, though a $20 stockpot on the stove plus a borrowed 6-quart does the job for less.
Fill a slow cooker between half and three-quarters full. Packed to the rim, it heats unevenly and sloshes every time someone ladles.
5. Add a Meatless Pot
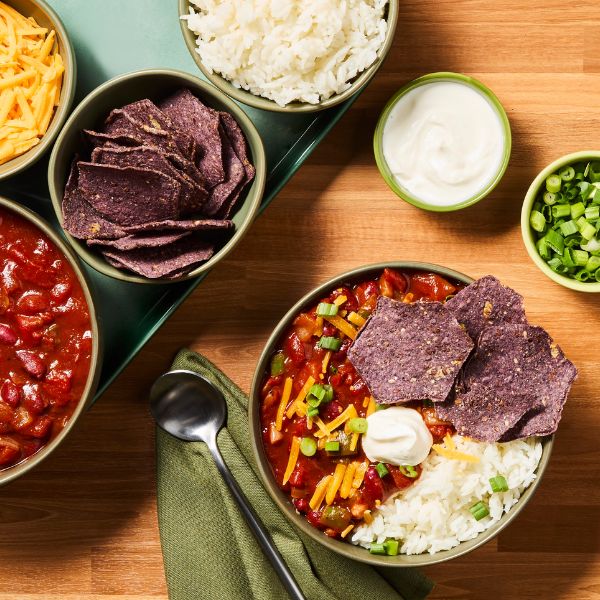
Vegetarian guests are not the only reason this pot earns its spot. With ground beef over $6 a pound, a three-bean chili feeds 8 to 10 for about $8 to $10 total, which is the least expensive thing on the whole table.
Two cans each of black beans, pinto beans, and kidney beans run $1 to $1.50 apiece, plus a can of fire-roasted tomatoes, a diced onion, and chili powder. Dried beans soaked overnight drop that number by half.
Guests rarely notice the beef is missing once the cheese and toppings go on top.
6. Cook It the Day Before
Chili genuinely tastes better on day two. The spices settle, the beans soften, and the whole pot tastes as if you simmered it twice as long as you did.
Cook it the day before, cool it, and refrigerate it in the slow cooker insert if yours is removable. That costs you nothing extra and buys back your entire morning.
Reheating is the part to get right. Bring it back to 165°F on the stove or on high, stirring so there are no cold pockets in the middle, then drop it to warm to hold. Starting a cold insert on the warm setting will not get you there safely.
7. Scale the Pot for a SuperBowl Crowd
A SuperBowl spread runs long, four hours or more, and people come back for seconds between quarters. Plan closer to two cups per guest instead of one and a half, which means two full 6-quart pots for 16 to 20 people. Figure about $30 to $40 in groceries across both.
A small 2-quart crock of chili cheese dip on warm alongside them gives early arrivals something to eat before the chili bar officially opens. “17 Chili Cheese Dips Worth Making a Second Batch Of” has options, and “How To Host a SuperBowl Party on a Budget” covers the rest of the party.
My husband and I hosted for years when our kids were home. The second pot was always the difference between relaxing and refilling.
Build the Toppings Bar
8. Cheese and Dairy
Shredded cheddar is the one topping nobody skips, so buy more than you think. An 8oz bag of store brand costs around $2.50 to $3 at Walmart or Kroger, and pepper jack runs a little higher, about $3 to $3.50 for the same size. Set out around 2 cups of each for 10 guests, which is roughly two bags apiece if your crowd is generous with the scoop.
For the creamy side, a 16oz tub of sour cream comes in at about $1.50 to $2. Plain Greek yogurt, about $3 to $4 for the same size, tastes nearly identical once it hits hot chili and gives anyone watching their protein an easy out. Prices do swing by region, so yours may land a little above or below mine.
Shredding your own from a 1lb block saves about a dollar and melts noticeably better.
9. Crunch
Fritos disappear faster than anything else on a chili bar, no contest. A 15.5oz bag of Fritos original costs about $4 to $5, and you want two bags for 10 to 12 guests.
Round it out with tortilla strips, about $3 for a 9oz bag, and oyster crackers at roughly $2.50 a box. Those oyster crackers are the Cincinnati move, and they soak up just enough chili without turning to mush. A sleeve of saltines from a $2 box, crushed into a bowl, costs almost nothing and works just as well.
Put the crunchy bowls at the end of the line so nothing turns soggy under a ladle of chili.
10. Heat
If one guest eats ghost peppers for fun and another thinks black pepper is spicy, a heat station keeps everyone happy without you adjusting the pot. I spend about $1.50 a pound on fresh jalapeños, and 4 to 5 peppers sliced thin fill a small bowl. A jar of pickled jalapeños goes for about $2 to $2.50 and keeps in the fridge for months, which makes it the easiest one to have on hand.
The hot sauce lineup is what turns this from a topping into a bar. Set out two or three bottles, something like Cholula and Frank’s RedHot at about $2.50 to $3.50 each, instead of one lonely bottle. Add a crushed red pepper shaker for roughly $2, and you’ve covered every heat level at the table for under $12.
11. Fresh
Everything else on the bar is warm, soft, and beige, which is exactly why the fresh bowls matter. A bunch of green onions costs about $1, cilantro another $1, and a red onion runs around $0.80. Dice all three the night before, and they hold fine in covered containers.
Avocados cost about $1 to $1.50 each, and 4 to 5 cover 10 guests if you dice rather than mash. Limes at roughly $0.50 apiece give you 6 to 8 wedges, and one squeeze over a bowl of red chili wakes the whole thing up.
Cut the avocado last, right before guests walk in, and toss the pieces with a little lime juice to keep them from browning in the bowl.
12. What Goes Under the Chili
This is the category that turns a cup of chili into actual dinner, and it’s the one most hosts forget. Back when we were paying off debt, a base under the chili was how I made one pot feed a full table without doubling the ground beef.
Cooked rice from a $1.50 bag costs pennies per serving. Baked potatoes are the heartiest option, about $4 to $5 for a 5lb bag, which gives you one per guest. A 1lb box of elbow pasta runs about $1.25 and makes instant chili mac. A 13oz bag of tortilla chips, around $3, works for anyone who wants nachos instead.
If the potatoes are the hit of the night, our Budget-Friendly Chili Baked Potato walks through getting the skins crisp.
13. Cornbread on the Side
Sixteen squares of cornbread for about $2 to $3 is the best math on this whole table. Two boxes of Jiffy-style mix cost roughly $1.50 to $2 each, baked in a 9×9 pan for about 20 to 25 minutes at 400 degrees, then cut into squares once cool enough to handle.
Stack them on a plate at the end of the bar so guests can grab one on the way to their seat. Bake it the night before, cover the pan with foil, and warm it for 10 minutes before people arrive.
If you want cornbread doing more of the work, our Budget-Friendly Skillet Cornbread Tamale Pie turns the same mix into a full meal.
14. Honey Butter for the Cornbread
Honey butter sounds like something a restaurant charges extra for, and it takes five minutes. Soften one stick of butter, roughly $1.25 worth from a $5 pound, whip it with 2 to 3 tablespoons of honey and a pinch of salt, and you’ve got about 3/4 cup for under $2. That’s plenty for 16 cornbread squares with some left over.
For a spicier version, mince a tablespoon of pickled jalapeños from the heat station and fold those in instead of some of the honey. Make it the night before and let it sit on the counter for 30 minutes before guests arrive so it’s spreadable.
Guests always ask about this one, and it costs less than the cornbread itself.
15. Pantry Toppings You Probably Already Own
Check the pantry before you add another thing to the grocery list. A can of corn runs about $1, sliced black olives about $1.50 to $2, and a 4oz can of diced green chiles around $1. Drain all three, dump them in small bowls, and you’ve added three toppings for roughly $4 and zero prep time.
Quick-pickled red onions cost even less. Slice one onion, about $0.80, cover with equal parts white vinegar and water, add a teaspoon of sugar and a pinch of salt, and let it sit for 30 minutes.
Keep a jar of these going all winter. They work on chili, tacos, and sandwiches, and they last two weeks in the fridge.
Set Up the Serving Line
16. Bowls That Cut Down on Dishes
Nobody wants to spend the fourth quarter at the sink. Plain paper bowls land around $4 to $6 for a 20-count at Walmart, but the sturdier Chinet-style ones are worth the jump to about $6 to $7 because they don’t go soft under hot chili. Disposable 9oz cups, around $3 to $4 a sleeve, work beautifully for smaller tasting portions when people want to come back for seconds of the other pot.
For the spread that looks like you fussed, bakery sourdough bread bowls total around $6 to $8 for a six-pack at the Walmart bakery. Hollow them out, save the bread you pull for dunking, and plan one per guest for a crowd of six.
Stack the bowls at the front of the line so the first thing anyone picks up is the thing they’ll eat out of.
17. Walking Chili
My grandkids ask for this one by name, and it’s the reason I now keep single-serve Fritos in the pantry all winter. A box of 40 one-ounce bags totals around $8 to $10 at Walmart or a warehouse store, which covers 10 to 12 guests with seconds.
You slit the bag open along the side seam so it lies flat like a little boat, ladle chili right in, and hand out a fork. Cheese and a spoonful of sour cream go on top. No bowl, no plate, and the trash can takes the whole thing when they’re done.
Set the opened bags on a rimmed sheet pan before you ladle. They tip, and a sheet pan catches it so your counter doesn’t.
18. Build the Line So It Only Moves One Direction
A serving line jams when two people are reaching across each other for the shredded cheese. Set it up in order: bowls first, then the pot, then toppings from heaviest to lightest, then forks and napkins at the very end so nobody is holding silverware while they scoop.
Plastic forks go for about $3 for a 48-count, and a 100-count pack of napkins runs close to $3 too, both at Walmart.
If you’re serving two pots, buy a second ladle for about $3 to $5 so both pots move at the same time instead of one line waiting on the other.
19. A Vessel for Every Topping
A 12-cup muffin tin, about $8 to $10 at Walmart, is the single best serving piece for a chili toppings bar. Twelve toppings sit in one pan; they carry to the counter in one trip, and the whole thing goes in the dishwasher when the party’s over.
For anything wet, like sour cream or pickled jalapeños, small glass bowls at Dollar Tree are $1.25 each and a set of six is still under $8. Garage sale ramekins work just as well and often cost next to nothing.
Plan on 8 to 10 vessels for a full spread, each with its own spoon. One shared spoon is how pickled jalapeño juice ends up in the cheddar.
Go Sit Down and Eat Your Own Chili
Standing at the stove while everyone else eats isn’t a rule you have to follow, even if it’s the one you’ve always known. That two-dinner shuffle wasn’t working for you, and it’s not working for anyone else standing at the stove right now either. A chili bar hands the work back to your guests so you can finally fill your own bowl.
Start with One Pot or Two if you’re feeding picky eaters and heat lovers under the same roof, add a Meatless Pot so your vegetarian guest isn’t stuck eating sides, and set up Keep It Hot Without Babysitting It so you’re not stuck playing slow cooker monitor all afternoon. Pick a few toppings, set the line, and walk away from the stove. You’ve earned a seat at your own table.
The post 19 Chili Bar Ideas That Let You Finally Sit Down and Eat appeared first on Penny Pinchin' Mom.




 Bengali (Bangladesh) ·
 English (United States) ·